I usually use my blog for talking about my work and technology-related projects, but today I wanted to share a fun adventure that I have been on recently. There is nothing Ubuntu or community management related in here, but I think it my tickle the interest of some of you, in the same way this has captivated me.
In the last few months I have been getting increasingly into *barbecue*.
Now, to put this in perspective, I am a *terrible* cook. I have never really had an interest in cooking. While I love eating great food, I have never been particularly interested in how it was made. Then, about a year and half ago when my wife and I moved into our house which is in a warmer part of the bay area, my mother in law bought us a grill and I started getting interested in how to use it. The main reason why I developed this renewed interest is that outdoor cooking seemed like a fun thing to do (I had this romantic vision of being outside with sunglasses, shorts, and cooking great food), and there is something I like about the idea of cooking with fire.
While grilling caught my interest, it wasn’t until I learned about smoking and barbecue that I really got interested. I read about people smoking pieces of meat for many hours over a fire, and the meat being incredibly tender and delicious. When I heard about this I absolutely had to try it out. Not only this, but as I discovered more about smoking, there is a real *science* behind it. I was excited to learn the science behind something so simple and fundamental: cooking with fire.
The first thing I needed to do was buy a smoker. Now, there are different types of smoker (electric, gas, charcoal etc), and although charcoal is considered the *pure* way to do BBQ, I wanted to start with something easier to control. As such, I decided to use electric, and I bought a cheap smoker from Home Depot – the Brinkmann 810-7080-4 Gourmet Electric Smoker and Grill.
This unit cost about $65 dollars and it is a [water smoker](https://www.smoker-cooking.com/verticalwatersmokers.html). The way it works is that it has a tray at the bottom that you fill with lava rocks that hold and transmit heat, and the heating element sits on top of it. Further up the unit is a water pan, and above that are the two cooking grills. To use it you switch the unit on, add some flavoring wood to the lava coals to create some smoke (such as hickory), fill the water pan (the water can keep a consistent moisture in the unit), and then add your food to the grates.

This smoker is pretty simple to use, and has no temperature control. It locks in at around 250 which is the right temperature for low and slow cooking (225 – 250) for doing things such as ribs, brisket, and pulled pork. It is not really suitable for grilling as you can’t get the temp high enough to sear steaks.
Although simple, the smoker has some downsides. Firstly, there is no thermometer, so I needed to mod my smoker and add my own. Secondly, the lack of temperature control would be fine if the smoker was super-insulated, but this thing leaks heat like a shed. On a warm day this is fine, but one time I did an overnight smoke and this baby was running for 25 hours to smoke two 8 pound pork butts. If I could control the temperature I could increase the heat in the middle of the night when it cools, but with this smoker…no banana; the temp dropped throughout the early hours and slowed down my cook.
The other downside with this smoker is that it is pretty small. While it could be fine for smoking for a small family, the width of the unit is not wide enough to accommodate baby-back ribs, so this means you need to pinwheel them (this is when you use a toothpick to hold the rack in a circle) or chop them in half. The problem with chopping them in half is that you can’t use [the bend test](https://www.amazingribs.com/tips_and_technique/are_they_ready.html) to check when they are done…and this resulted in some pretty tough racks of baby backs.
When I bought this smoker I also bought a few other essentials such as tongs, heat-proof gloves (for pulling pork/chicken), skewers, and I bought a few great books on smoking and grilling. First of all, check out [Weber’s Way to Grill](https://www.amazon.com/Webers-Way-Grill-Step—Step/dp/0376020598/ref=sr_1_1?ie=UTF8&qid=1344834009&sr=8-1&keywords=weber+book) (which has become my go-to-guide as I learn), and then also see [Smokin’ with Myron Mixon](https://www.amazon.com/Smokin-Myron-Mixon-Winningest-Barbecue/dp/0345528530/ref=sr_1_1?s=books&ie=UTF8&qid=1344834050&sr=1-1&keywords=myron+mixon) (Myron Mixon is a famous BBQ grand champion). Part of the reason I bought the latter book was from becoming a bit of a fan of Myron Mixon after watching [BBQ Pitmasters](https://tlc.discovery.com/tv/bbq-pitmasters/) on Netflix.
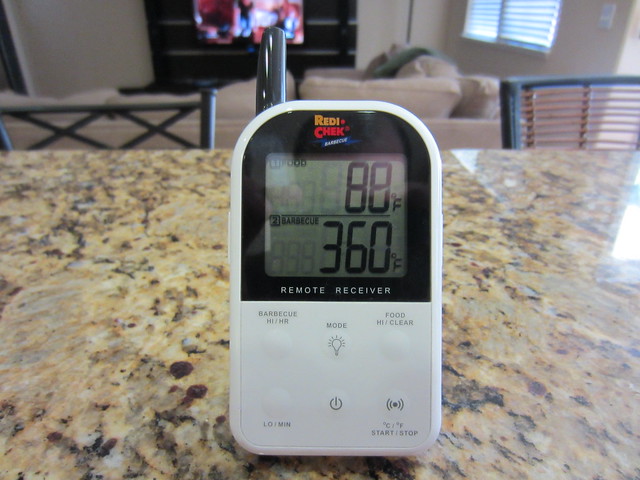
One item I purchased which I thought would be a bit of a luxury but has become invaluable is the Maverick ET732
wireless thermometer. It works by providing a transmitter unit with a temperature probe for the pit (which you attach to the grill) and a probe for the food (which you jab into the meat). These two temperatures are then transmitted to the receiver that helps you to keep an eye on the cook from inside.
This device has a few distinct benefits. Firstly, it gives me a precise idea of the temperature of the meat so I can check when it is done. Secondly, it means that overnight smokes (such as a pork butt or a big brisket cook) can be done and I can keep an eye on things when I am in bed. Thirdly, I get a more accurate pit reading as the temp that is being taken is at the grill level where the food is, as opposed to on the lid or base where the manual read thermometer is. The unit also includes alarm support which means that if the pit or food drops lower or exceeds particular temps it will will alert you…such as waking you up if something is going crazy when you are smoking overnight.
With my gear all good to go, I spent a number of fun weekends trying out different meats and learning different techniques. I have smoked brisket, baby back and spare ribs, chicken, and pork butt. I learned a bunch of things throughout this time such as:
* Get a spray bottle an fill it with apple juice to [spritz](https://tipsforbbq.com/Definition/Spritzing-Ribs) your meat every so often to keep it moist.
* Resist the temptation to constantly check on your cook. As the BBQ manta goes: *if you are looking, you ain’t cooking*. 🙂
* To reduce flare-ups (when your flavor wood sets on fire and increasing the temp of the cooker), soak your flavor wood first.
* There are various tests for checking when your food is cooked, and it is important to know them.
* There are many different approaches to foiling. For example, for ribs many people use the [3-2-1 technique](https://wyntk.us/3-2-1-rib-method) which includes a piece in which you foil the ribs to help keep the moisture in.
* [Resting meat](https://www.seriouseats.com/2009/12/how-to-have-juicy-meats-steaks-the-food-lab-the-importance-of-resting-grilling.html) is critical; when I rest my meat I wrap it in foil and then wrap it in old towels and put it in a cooler. This has a dramatic impact on the quality of your results.
If there is one lesson I have learned more than anything, it is that great BBQ is all about *maintaining a consistent temperature*. As an example, if you want great ribs, you need to smoke them at 225 – 250 and keep in that temperate range for a long period of time to help the collagen dissolve into gelatin for that *fall-off-the-bone* goodness. Interestingly, in competitive BBQ *fall-off-the-bone* is frowned upon; it is considered over-cooked. Personally, I *love* fall-off-the-bone. 🙂
The problem with my dinky little smoker is that there is simply no temperature control. As such, for longer smokes where the weather changes (such as wind, cooling, heating up, rain), this impacts the smoker and therefore maintaining the temp was complicated. As an example, when doing a long smoke that goes into the evening, when the sun went down it was difficult to bring the temp up enough.
Not only was there this temp issue, but I was also itching more and more to move from electric to charcoal and start doing barbecue with nothing but a pit and fire, and learning how to control the temp to create awesome food.
This is going to sound a bit weird, and my wife also thinks it is a tad bonkers, but there is something magical in my mind about the idea of cooking with fire. This probably boils down to some cavemen DNA still rumbling around in my body, but I love the idea of getting back to basics and learning how to create awesome food with fire…and charcoal…I am not that much of a caveman. 🙂
As such, I came to the conclusion that it was time to upgrade. I looked at three options; the [Big Green Egg](https://www.biggreenegg.com/eggs/sizes/), the [Primo Oval Junior](https://primogrill.com/primo-grills/primo-grills-ovaljr/), and the [Weber Smoker Mountain](https://www.weber.com/explore/grills/smokers-series/smokey-mountain-cooker-22).
The *Big Green Egg* and *Primo Oval Junior* grills are [Kamado cookers](https://en.wikipedia.org/wiki/Kamado), made of ceramic, and based upon 2000 year old cooking techniques. They maintain heat tremendously, are fantastic for smoking, grilling, and baking (the ceramic nature means they can also act like a pizza oven), but they are expensive (the Large Big Green Egg comes in at $899 not including the stand). Aside from the cost, the Large Big Green Egg also had a smaller cooking size than I would like and they risk cracking if you knock one over.
To be honest, I was pretty captivated by the idea of the *Large Big Green Egg*. Although expensive, these things are built to last a lifetime and are passed down from generation to generation, but with a baby on the way I found it difficult to justify such an expensive smoker. I checked the Primo as an alternative, but it is not that much cheaper. As such, I started looking more at the Weber Smokey Mountain.
The Weber Smokey Mountain comes in two sizes: 18.5″ and 22.5″
, and it has a fanatical following, and is used by many professional competition cooks (such as [Harry Soo](https://www.slapyodaddybbq.com/about/)). It is a water cooker, but it uses charcoal (or wood) instead of my familiar electric, and it is made by Weber, who have a long history of quality, with apparently *fantastic* customer service.
As I was researching the unit, I found quite possibly the most incredible enthusiast site I have ever seen for a product; the [Virtual Weber Bullet](https://www.virtualweberbullet.com/). This site has an encyclopedic knowledge of the cooker, and every minute detail you could ever want to know about the cooker is documented, complete with guides, videos, and an active forum.
The Virtual Weber Bullet site is run by *Chris A. Allingham* and part of the way in which he funds the site is with Amazon affiliate links, so when I pulled the trigger to buy the bigger 22″ model, I used his link. I decided to buy the bigger model so I could have plenty of room for parties and I figured it would be better to have more space than less.
I also dropped Chris an email to say thank-you for his wonderful website, and interestingly he is based in the South Bay (about an hour from where I live). When I emailed him Chris was interested in discussing about community growth, so offered to drop him a copy of [my book in the post](https://www.artofcommunityonline.org/). I hope we can get together to do a cook one day (and hopefully some of his knowledge can rub off on me). 🙂
This weekend the 22″ Weber Smoker Mountain arrived in a box about the size of Australia:

I put together the smoker (which took about 15 minutes) and it is a bit of a monster:

The way the smoker operates is really interesting, and gets back to my interest in controlling fire. If you look at the picture above you can see that it is broken into three pieces:
* The bottom piece (with the legs) is where you add the charcoal.
* The middle piece (with the door) is where you add the water bowl and the lower food grill.
* The top piece (with the handles) is where you have the top cooking grill.
If you look at the bottom piece in the picture above you can see a circle with four smaller circles on it. This is a vent. There are three vents on the bottom and one vent on the top. To control the temperature of the unit you build your fire and then use the vents to control how much airflow enters the cooker, and this controls how hot it gets. If you want it hotter, open the vents and let more air in, if you want it cooler, close the vents. Depending on how much you open and close the vents, you can dial in the temperature that you need.
When I bought the smoker I also bought a few important items for using it, namely some heat-proof BBQ gloves, and also a chimney that is used to start the fire.
For my first smoke I figured I would start simple and smoke [beer-can chicken](https://www.foodnetwork.com/recipes/the-surreal-gourmet/beer-can-chicken-recipe/index.html). I chose this for a few reasons. Firstly, chicken is quite greasy, and I wanted to [season](https://virtualweberbullet.com/seasoning.html) the smoker and get a layer of grease on the walls of the unit (this layer helps maintain temperature and protect the unit). New Weber Smokey Mountain grills tend to run about 50 degrees too hot (due to the reflective nature of an unseasoned cooker), so I wanted to get it all greased up. Secondly, chicken is cheaper than ribs, and for my first charcoal smoke, I didn’t want to screw up an expensive cut of meat until I knew what I was doing. 🙂
To be honest, I was a little nervous about my first smoke. Not only had I never used charcoal before, but it was a really hot day and the smoker was already at 170 degrees inside the cooker without any fire in there.
I kicked off my first smoke by filling the chimney with Kingsford charcoal and lit a few of the Weber fire-starter lighter cubes and got a nice burn going:
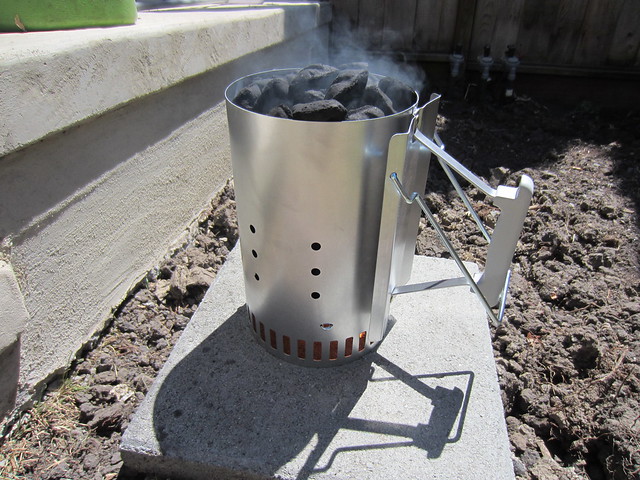
I then cracked upon the smoker and put the charcoal in:
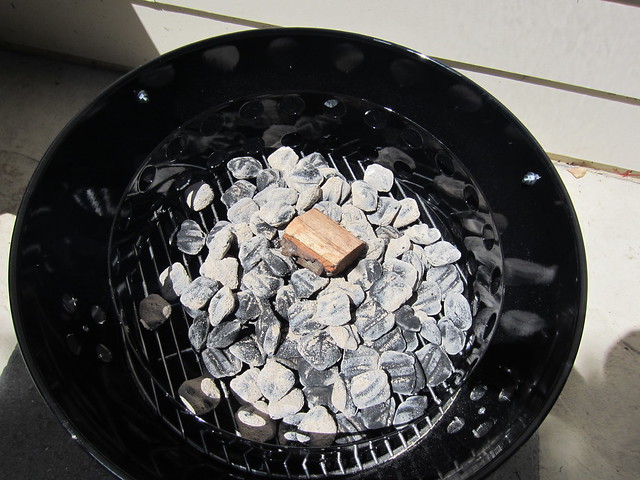
I then put the middle section on, and there is plenty of space for food:

With my trusty Maverick attached to the grill and monitoring the pit and food temperature I was good to go:
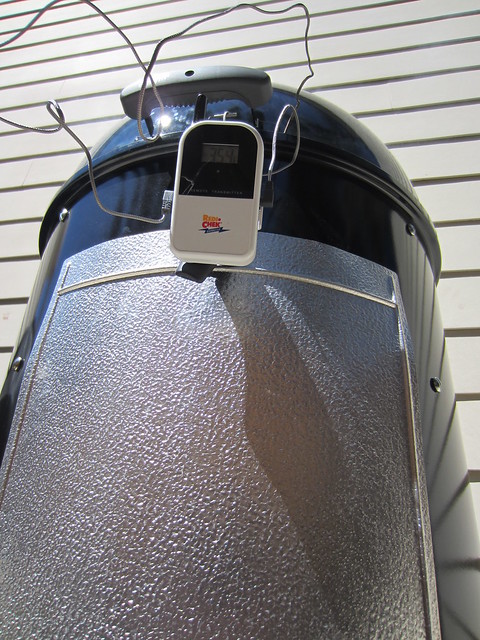
I popped the beer-can chicken on and smoked it with a pit temperature of 350 until it hit an internal temp of 170. About three hours later it was done

After letting the bird rest for about 20 mins I cut it open and I saw the juiciest chicken I have ever seen. It was incredible. I was delighted with the results of my first smoke.
As I mentioned earlier, I was pretty nervous about how well I would do keeping a consistent temp using the Weber Smokey Mountain, but it stunned me how well it maintained temp. I would dial it in using the vents, and when it was there it held the temp really well. The only time it started to fall was when it needed more charcoal (I didn’t add quite enough), so I threw a few more coals in there and it went back up.
In a nutshell, I have been having a blast learning how to smoke and grill, and it has been wonderful to get outside and get some fresh air, learn about meat and controlling temperature, learning how fire works, different seasoning and rub styles, and for the fruits of this learning to be delicious barbecue. I am still very much at the beginning of my journey, but if you are even vaguely interested in this, I would heartily encourage you to give it a try. It really is a lot of fun. 🙂


