There is quite the buzz in the community about the new Compiz-driven Unity, and I know many of you are keen to play with it. Of course, do remember that it is *incredibly early* in the cycle and more things are likely to be broken than fixed as the transition is made. Some of you will be bummed out with the [announcement that there will be no Maverick PPA for Unity](https://archivedblog.jonobacon.com/2010/11/18/no-maverick-ppa-for-unity/), but fortunately, it is really easy to try Natty and Unity in a way that won’t involve sacrificing your current stable installation, or even touching your hard drive. You simply install and boot from a USB stick, and I wanted to share how to get this running.
**NOTE**: although Unity has now landed in Natty, some features such as the dash (the Ubuntu button) and the Applications/Files places have not landed yet. They should land ready for Alpha 2.
To do this you will need…wait for it…a USB stick! Get one with at least 2GB of space. Fortunately there are some pretty large USB sticks that are really cheap. In fact many are given out for free at conferences. Just sayin’… 🙂
Just follow these steps to get started:
### Step 1: Download the latest Daily Natty image
Go to [this page](https://cdimages.ubuntu.com/daily-live/current/) and download an ISO for your computer. It should be saved to the `Downloads` directory on your computer.
### Step 2: Create the USB stick installation
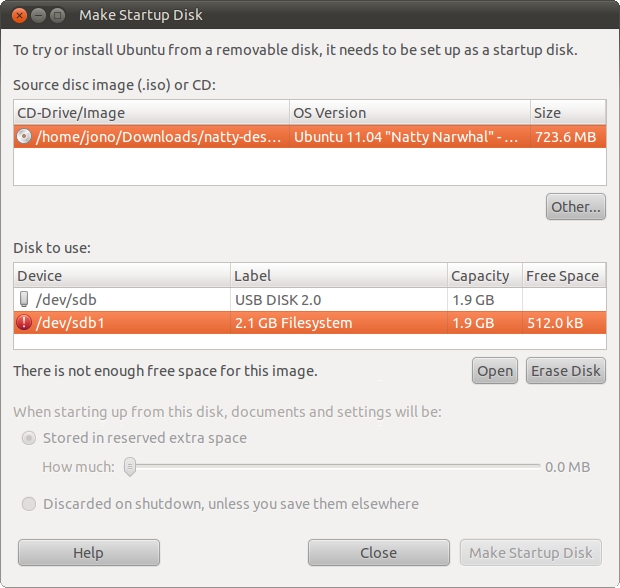
Click *Applications -> System -> Startup Disk Creater*. It looks like this:

When you start the application, it will likely automatically find the ISO you downloaded, which is displayed in the top pane. If you don’t see it, click the *Other* button and go and select the ISO (typically in your *Downloads/* directory in your home directory).
It is recommended you first erase your USB stick, so select it in the bottom pane and click the *Erase Disk* button. When this is complete, you can then use the slider underneath the *Stored in reserved extra space* slider to select how much disk space can be used for saving files, documents and other things. I personally move the slider all the way to the right to use the maximum space available.
Finally, click the *Make Startup Disk* button and Natty will be installed to your USB stick.
### Step 3: Reboot
Now you need to boot from USB stick. To do this you may need to enter your BIOS to enable your computer to be able to boot from the USB stick. When this is enabled you will typically need to hit a button when you boot to see the BIOS’s boot menu (e.g. on my Thinkpad T400 it is F12) and then you can select the USB drive.
Ubuntu should boot and look and function the same as usual, apart from being much slower as you are running from the USB disk.
### Step 4: Update
Although you installed the latest daily you should ensure it is up to date, and you can do this with:
sudo apt-get update
sudo apt-get upgrade
### Step 5: Test and Report Bugs
Although Natty is still very much in the early stages of development, we want to know when you experience bugs. If we don’t know about the bugs our community can’t fix them!
Many of you will be particularly interested in testing Unity, and we are really keen to hear about bugs and problems in Unity. Filing a bug is simple. Just open a terminal and run:
ubuntu-bug unity
The `ubuntu-bug` program zips up some debugging data from your system and will then fire up a page in your browser where you can enter a bug report. This will then provide details of the problem to the Unity developers to help fix the bug.


